
For Monitoring Linux/Windows hosts in Zabbix Server, we need to install Zabbix Agent to our Remote Linux/Windows systems, in this guide we are going to show you how to install Zabbix Agent on Windows Server 2012 R2.
Check our previous tutorials to learn how to install Zabbix Server:
- How To Install Zabbix 3.4 Monitoring Server On Ubuntu 16.04 LTS
- How To Install Zabbix 3.4 Server On CentOS 7 / RHEL 7
- How to install Zabbix Agent on Ubuntu 16.04 LTS
- How to install Zabbix Agent on CentOS 7 / RHEL 7
Step 1./ Download latest windows Zabbix Agent
– Download latest windows zabbix agent source code from zabbix official site: https://www.zabbix.com/download_agents
The agent executable is located in the subdirectory bin/win32 or bin/win64 choose the one that is appropriate for your architecture and place it on some directory in the Windows machine. For simplicity, we have created a new folder C:\zabbix , but you are free to use any other directory. We will also need the configuration file, so grab the example provided at \conf\zabbix_agentd.win.conf, place it in the same directory and rename it to zabbix_agentd.conf.
Step 2: Edit the Zabbix Agent configuration File
– Open zabbix_agentd.conf in your favorite text editor and edit the following parameters:
LogFile=c:\zabbix\zabbix_agentd.log
Server=IP_Zabbix_Server
ServerActive=IP_Zabbix_Server
Step 3./ Install Windows Zabbix Agent
– Lets install zabbix agent as windows server by executing following command from command line:
C:\zabbix>zabbix_agentd.exe --config zabbix_agentd.conf --install
zabbix_agentd.exe [4376]: Service "ZABBIX Agent" installed
successfully.
– To start the service just type:
C:\zabbix>zabbix_agentd.exe --start
Step 4./ Windows Firewall Setting
– To make sure that the zabbix agent can connect to the Zabbix Server open Control Panel -> System and Security -> Windows Firewall and hit on Allow an app through Windows Firewall
Next, click on Allow another app button and a new window should open. Use the Browse button to navigate to the path of the Zabbix agent executable file, then hit on Add button.
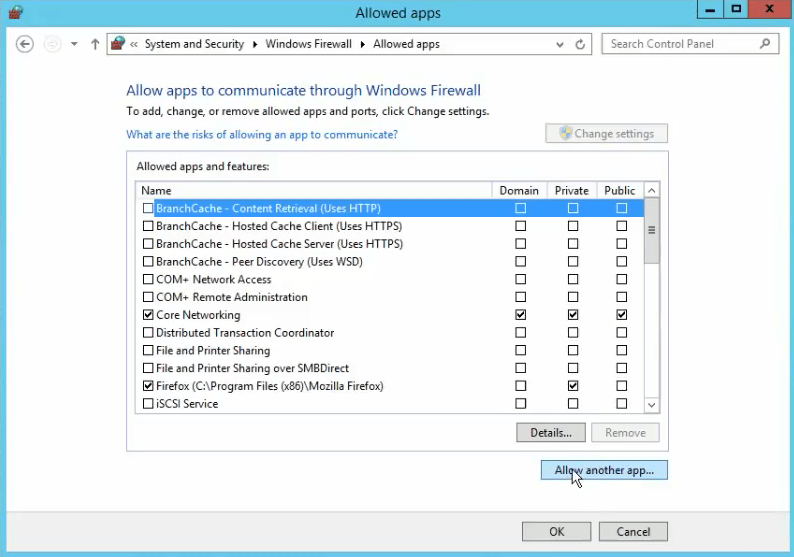
– Finally make sure you check the firewall rule network segment in our case is Private and Doamin and click OK button.

Step 5./ Add Windows Host to Zabbix Monitoring Server
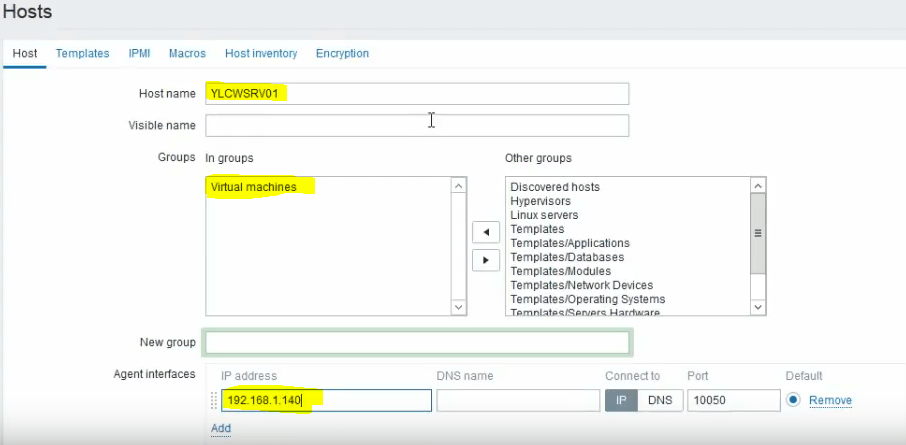
– Go to Zabbix Server web interface, move to Configuration tab -> Hosts and hit on Create Host button in order to add the Windows monitored
host.
– On Host window add the FQDN of your windows agent machine in Host name filed, add an arbitrary name to Visible name filed in order to easily identify the monitored machine on Zabbix panel, make sure the host is included into a Group Servers and add the IP Address of your windows host in Agent interfaces filed. The Port value leave it unchanged.
– Next, go to Template tab and hit on Select button. A new window with Zabbix Templates should appear. Navigate through this window, check Template OS Windows and hit on Select button to add the template . Once the Template OS Windows appears on Link new templates filed, hit on Add button in order to link this template to the windows host configuration.

– Finally, hit on below Add button to complete the process and add the entire Windows host configuration.
We hope this tutorial was enough Helpful. If you need more information, or have any questions, just comment below and we will be glad to assist you!

2 comments
do we need to install zabbix aget on each and every server or in only one windows servr ?
Hi,
of cource you need to install the agent in every server that you plan to monitor.