Rundeck is an open-source software Job scheduler and Run Book Automation system for automating routine processes across development and production environments. It combines task scheduling, multi-node command execution, workflow orchestration and logs everything that happens.
In this quick tutorial, we are going to show you how to install and configure Rundeck server on centOS 8 using mySQL as database. Rundeck requires java 8 to run, so follow this guide before proceeding How to Install Java on CentOS 8.
Install Rundeck on Centos 8
01- First, let’s import the Rundeck GPG key using the following rpm command:
$ sudo rpm --import http://rundeck.org/keys/BUILD-GPG-KEY-Rundeck.org.key
02- Install the latest Rundeck Repository by running the below command:
$ sudo dnf install -y http://repo.rundeck.org/latest.rpm
03- Install the latest version of Rundeck by typing:
$ sudo dnf install rundeck -y
04- By default, Rundeck uses an H2 database as its repository. But the use of H2 database is not recommended for production environments. Therefore, we will use MySQL as a database backend for Rundeck.
– Run the below commands to create the Rundeck database:
$ mysql -u root -p
Welcome to the MariaDB monitor.  Commands end with ; or \g.
Your MariaDB connection id is 16
Server version: 10.3.17-MariaDB MariaDB Server

Copyright (c) 2000, 2018, Oracle, MariaDB Corporation Ab and others.

Type 'help;' or '\h' for help. Type '\c' to clear the current input statement.

MariaDB [(none)]> create database rundeck;
Query OK, 1 row affected (0.001 sec)

MariaDB [(none)]> grant all on rundeck.* to 'rundeckuser'@'localhost' identified by 'Password';
Query OK, 0 rows affected (0.001 sec)

MariaDB [(none)]> flush privileges;
Query OK, 0 rows affected (0.000 sec)

MariaDB [(none)]> exit
Bye
05- Once you done creating the Rundeck database, we need to configure Rundeck to connect to this DB. SO, update your rundeck-config.properties as below:
vi /etc/rundeck/rundeck-config.properties
grails.serverURL=http://SERVER_IP_or_FQDN:4440

dataSource.url = jdbc:mysql://localhost/rundeck?autoReconnect=true
dataSource.username=rundeckuser
dataSource.password=Password
dataSource.driverClassName=com.mysql.jdbc.Driver
06- Finally you can start Rundeck by running the below commands:
$ systemctl enable rundeckd.service && systemctl start rundeckd.service
$ systemctl status rundeckd.service
07- If you are using Firewall, make sure to open the port 4440 as below:
$ firewall-cmd --permanent --add-port=4440/tcp
$ firewall-cmd --reload
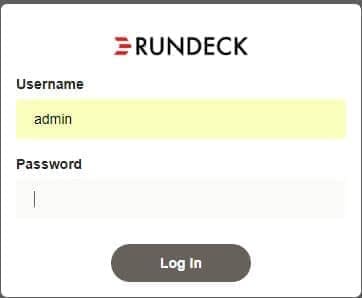
08- To verify the Rundeck has been installed successfully, open your web browser and go to the following address: http://your-server_ip:4440 or http://localhost:4440

Login to Rundeck web interface by using default username admin and password admin
Conclusion
You have successfully installed Rundeck on your CentOS 8 server. From here, you can check the following guides:


