AWS Load Balancer Controller (AWS ALB Ingress Controller) is a controller to help manage Elastic Load Balancers for a Kubernetes cluster.
- It satisfies Kubernetes
Ingressresources by provisioning Application Load Balancers. - It satisfies Kubernetes
Serviceresources by provisioning Network Load Balancers.
In this tutorial, we will cover how to install the AWS Load Balancer Controller in your EKS cluster and deploy a sample application.
Prerequisites
- An existing Amazon EKS cluster.
- The
eksctlcommand line tool installed on your computer. To install or update eksctl, see The eksctl command line utility. - The
kubectlcommand line tool installed on your computer. The version must be the same, or up to two versions later than your cluster version. To install or upgradekubectl, see Installing kubectl. - The
helmcommand line tool. To install or upgradehelm, see Installing helm
1./ Setup IAM role for service accounts
The controller runs on the worker nodes, so it needs access to the AWS ALB/NLB resources via IAM permissions. The IAM permissions can either be setup via IAM roles for ServiceAccount or can be attached directly to the worker node IAM roles.
0- Set the below values to your default AWS region, your account id and your EKS cluster name
AWS_ACCOUNT_ID=YOUR_ACCOUNT_ID_HERE # OR $(aws sts get-caller-identity --query Account --output text)
AWS_REGION=YOUR_AWS_REGION_HERE
EKS_CLUSTER_NAME=YOUR_EKS_CLUSTER_NAME_HERE
1- Create IAM OIDC provider
eksctl utils associate-iam-oidc-provider \
    --region ${AWS_REGION} \
    --cluster ${EKS_CLUSTER_NAME} \
    --approve
2- Download IAM policy for the AWS Load Balancer Controller
curl -fsSL -o iam-policy.json https://raw.githubusercontent.com/kubernetes-sigs/aws-load-balancer-controller/v2.4.0/docs/install/iam_policy.json
3- Create an IAM policy called AWSLoadBalancerControllerIAMPolicy
aws iam create-policy \
    --policy-name AWSLoadBalancerControllerIAMPolicy \
    --policy-document file://iam-policy.json
4- Create a IAM role and ServiceAccount for the AWS Load Balancer controller using eksctl tool
eksctl create iamserviceaccount \
    --cluster=${EKS_CLUSTER_NAME} \
    --namespace=kube-system \
    --name=aws-load-balancer-controller \
    --attach-policy-arn=arn:aws:iam::${AWS_ACCOUNT_ID}:policy/AWSLoadBalancerControllerIAMPolicy \
    --override-existing-serviceaccounts \
    --approve \
    --region ${AWS_REGION}
2./ Install AWS Load Balancer Controller using Helm
1- Add the EKS chart repo to helm
helm repo add eks https://aws.github.io/eks-charts
2- Install the TargetGroupBinding custom resource definitions
kubectl apply -k "github.com/aws/eks-charts/stable/aws-load-balancer-controller//crds?ref=master"
3- Install the helm chart by specifying the chart values serviceAccount.create=false and serviceAccount.name=aws-load-balancer-controller
helm install aws-load-balancer-controller eks/aws-load-balancer-controller \
    -n kube-system \
    --set clusterName=${EKS_CLUSTER_NAME} \
    --set serviceAccount.create=false \
    --set serviceAccount.name=aws-load-balancer-controller
4- Verify that the AWS Load Balancer controller is installed.
kubectl get deployment -n kube-system aws-load-balancer-controller

NAME                           READY   UP-TO-DATE   AVAILABLE   AGE
aws-load-balancer-controller   2/2     2            2           84s
3./ Verify the AWS Load Balancer Controller
To verify that the AWS Load Balancer Controller creates an Application Load Balancer as a result of the Ingress object, we will deploy the below example
1- Deploy all the blue application resources (namespace, service, deployment)
kubectl create -f https://raw.githubusercontent.com/faudeltn/Kubernetes/master/EKS-AWSALBIngress/1-nginx-blue-ns.yaml
kubectl create -f https://raw.githubusercontent.com/faudeltn/Kubernetes/master/EKS-AWSALBIngress/2-nginx-blue-deployment.yaml
kubectl create -f https://raw.githubusercontent.com/faudeltn/Kubernetes/master/EKS-AWSALBIngress/3-nginx-blue-service.yaml
2- List all the resources to ensure they were created.
kubectl get -n nginx-blue deploy,svc NAME READY UP-TO-DATE AVAILABLE AGE deployment.apps/nginx-deploy-blue 1/1 1 1 24s NAME TYPE CLUSTER-IP EXTERNAL-IP PORT(S) AGE service/nginx-blue NodePort 10.100.152.9680:31525/TCP 21s
3- Download the blue application ingress manifest locally and change the host value to your domain name.
curl -fsSL -O https://raw.githubusercontent.com/faudeltn/Kubernetes/master/EKS-AWSALBIngress/4-nginx-blue-ingress.yaml
spec:
  rules:
  - host: "blue.yallalabs.com" #CHANGE ME
    http:
      paths:
      - pathType: Prefix
        path: "/"
4- Deploy the ingress resource
kubectl create -f 4-nginx-blue-ingress.yaml
5- After few seconds, verify that the Ingress resource is enabled:
kubectl get ingress nginx-blue -n nginx-blue NAME CLASS HOSTS ADDRESS PORTS AGE nginx-blueblue.yallalabs.com k8s-ingressdemo-4234ef1652-1773112961.us-east-1.elb.amazonaws.com 80 48s
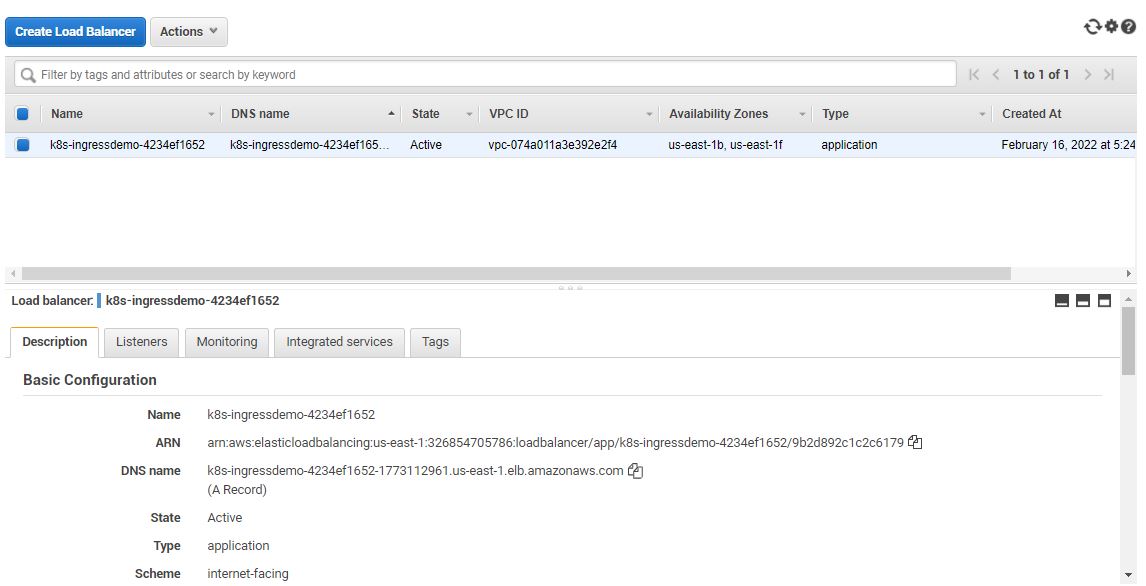
6- From your AWS Management Console, if you navigate to the EC2 dashboard and the select Load Balancers from the menu on the left-pane, you should see the details of the ALB instance similar to the following.

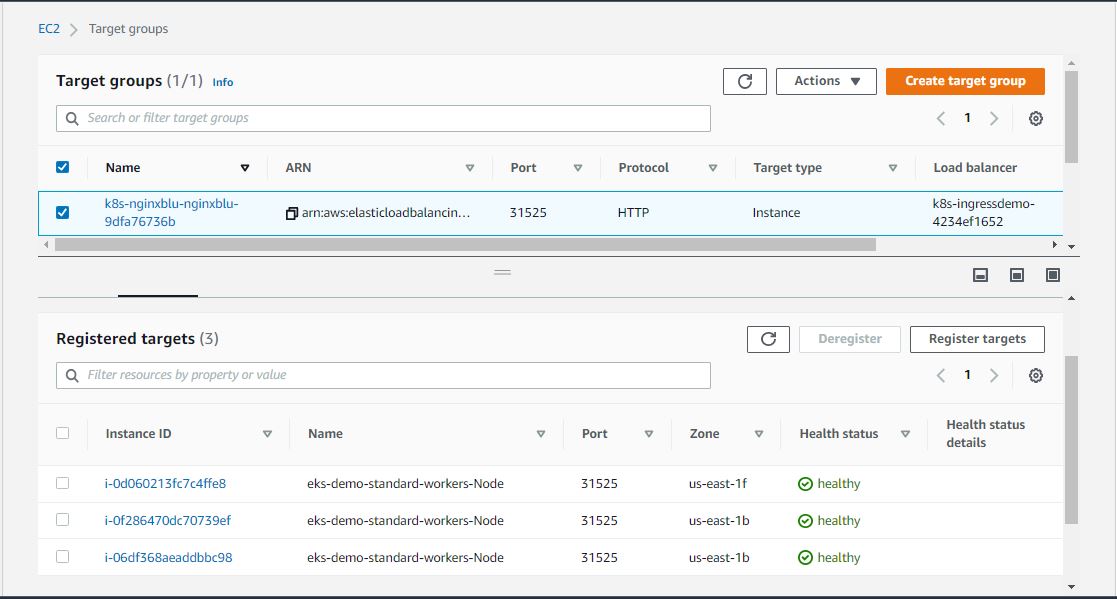
From the left-pane, if you select Target Groups and look at the registered targets under the Targets tab, you will see the instance ID and ports of the sample app pods listed.

Conclusion
In this tutorial, you have learned how to install AWS Load Balancer Controller in your EKS Cluster. For more details you can check the AWS Load Balancer Controller official documentation.


2 comments
Thank you!
Thx