
About Zabbix
Zabbix is a free and open source network monitoring Software tool which is used to monitor and track the availability and performance of your IT infrastracture: servers, network devices and other IT assets.
In this article we will install Zabbix 4.x on CentOS 7 and RHEL 7, in order to use Zabbix we required a Web Server (Apache), database server(Mysql, Mariadb, Postgresql …) and PHP to work.
If you want to upgrade your Zabbix Server 3.x to 4.x on CentOS 7 or RHEL 7 you can check this article: How to Upgrade Zabbix Server 3.x to 4.x on CentOS 7 / RHEL 7
Environment:
- Hostname = zabbix.yallalabs.com
- IP Address = 192.168.1.200
- OS = CentOS 7 / RHEL 7
Step 0 – Installing Prerequisites
– Before we begin, it is recommended to have SELinux in permissive mode, use the following command and reboot your server:
[root@zabbix ~]# sed -i 's/^SELINUX=.*/SELINUX=permissive/g' /etc/selinux/config
[root@zabbix ~]# reboot
– Note that we have to install Apache and MariaDB Server in our server:
[root@zabbix ~]# yum update
[root@zabbix ~]# yum install httpd -y
[root@zabbix ~]# yum install mariadb-server -y
[root@zabbix ~]# systemctl enable httpd && systemctl start httpd
[root@zabbix ~]# systemctl enable mariadb && systemctl start mariadb
– Don’t forget to set a password for the root using mysql_secure_installtion, take a look to this tutorial: Securing MySQL server / Mariadb with mysql_secure_installation
Step 1 – Install Zabbix Server with MySQL
– Before starting the installation we need to enable the zabbix repository using this commands:
[root@zabbix ~]# rpm --import http://repo.zabbix.com/RPM-GPG-KEY-ZABBIX
[root@zabbix ~]# rpm -ivh https://repo.zabbix.com/zabbix/4.0/rhel/7/x86_64/zabbix-release-4.0-1.el7.noarch.rpm
– Now use the below command to install Zabbix and necessary packages
[root@zabbix ~]# yum install zabbix-server-mysql zabbix-web-mysql zabbix-agent zabbix-get zabbix-sender zabbix-java-gateway -y
Step 2 – Edit PHP timezone
– Open the file /etc/httpd/conf.d/zabbix.conf created by Zabbix with your favourite editer
[root@zabbix ~]# vi /etc/httpd/conf.d/zabbix.conf
– It’s necessary to uncomment the “date.timezone” setting and replace it with your timezone:
php_value date.timezone Europe/Rome
– Save the file and don’t forget to restart httpd service using the below command:
[root@zabbix ~]# systemctl restart httpd
Step 3 – Edit create and import initial zabbix database and user
– First we need to create zabbix database (zabbixdb) and create a zabbix user (zabbixuser).
[root@zabbix ~]# mysql -u root -p
Enter password:
Welcome to the MariaDB monitor. Commands end with ; or \g.
Your MariaDB connection id is 10
Server version: 5.5.47-MariaDB MariaDB Server
Copyright (c) 2000, 2015, Oracle, MariaDB Corporation Ab and others.
Type 'help;' or '\h' for help. Type '\c' to clear the current input statement.
MariaDB [(none)]> CREATE DATABASE zabbixdb CHARACTER SET utf8 COLLATE utf8_bin;
Query OK, 1 row affected (0.00 sec)
MariaDB [(none)]> GRANT ALL PRIVILEGES ON zabbixdb.* TO zabbixuser@localhost IDENTIFIED BY "YOUR_PASSWORD";
Query OK, 0 rows affected (0.00 sec)
MariaDB [(none)]> FLUSH PRIVILEGES;
Query OK, 0 rows affected (0.00 sec)
MariaDB [(none)]> exit
Bye
[root@zabbix ~]#
– After creating the zabbix database and user we need to import the zabbix initial database using the below commands:
[root@zabbix ~]# zcat /usr/share/doc/zabbix-server-mysql*/create.sql.gz | mysql -u zabbixuser -p zabbixdb
– Now we need to edit database configuration in the zabbix server configuration file zabbix_server.conf
[root@zabbix ~]# vi /etc/zabbix/zabbix_server.conf
– Specify the database name for zabbix , database user name and the password
DBHost=localhost
DBName=zabbixdb
DBUser=zabbixuser
DBPassword=YOUR_PASSWORD
Step 4 – Adjusting Firewall
– Execute the following command to enable http service and connection between the Zabbix server and agents:
[root@zabbix ~]# firewall-cmd --permanent --add-service=http
success
[root@zabbix ~]# firewall-cmd --permanent --zone=public --add-port=10051/tcp
success
[root@zabbix ~]# firewall-cmd --permanent --zone=public --add-port=10050/tcp
success
[root@zabbix ~]# firewall-cmd --reload
success
– After adjusting the firewall we need to enable and start zabbix service on boot using the bellow commands:
[root@zabbix ~]# systemctl enable zabbix-server
[root@zabbix ~]# systemctl start zabbix-server
[root@zabbix ~]# systemctl enable zabbix-agent
[root@zabbix ~]# systemctl start zabbix-agent
Step 5 – Setup Zabbix Web Frontend
– Navigate to http://ip_address/zabbix or http://host_name/zabbix

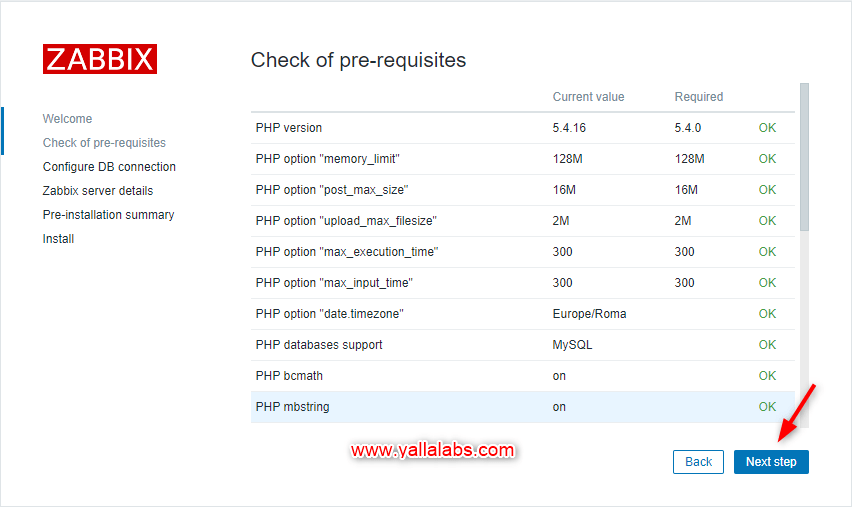
– Make sure that all software prerequisites are met.
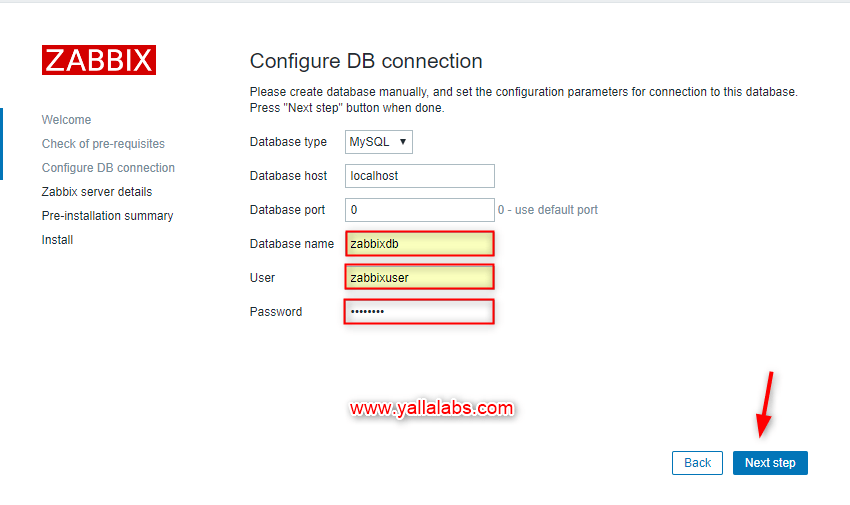
– Enter details for connecting to the database. Zabbix database must already be created.
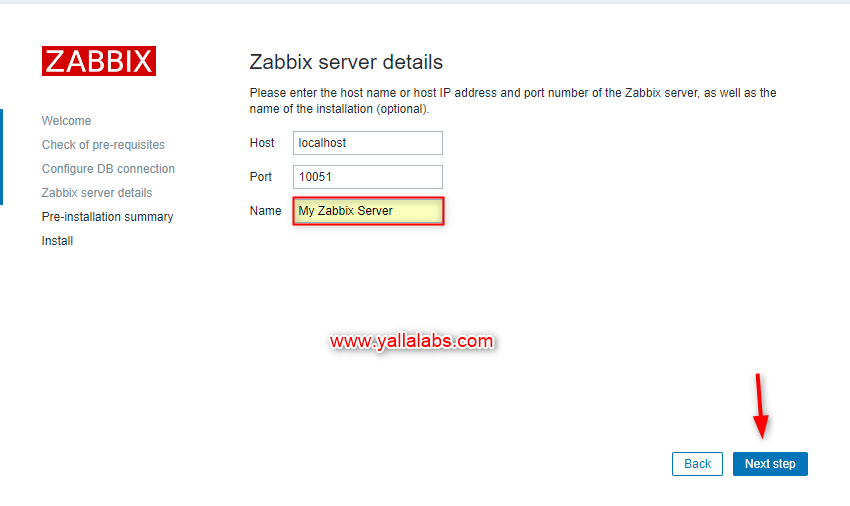
– Enter Zabbix server details.
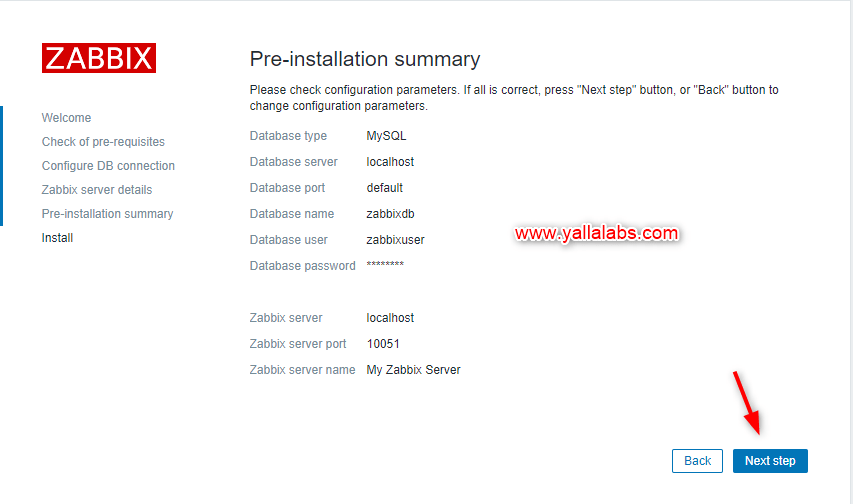
– Review a summary of settings.
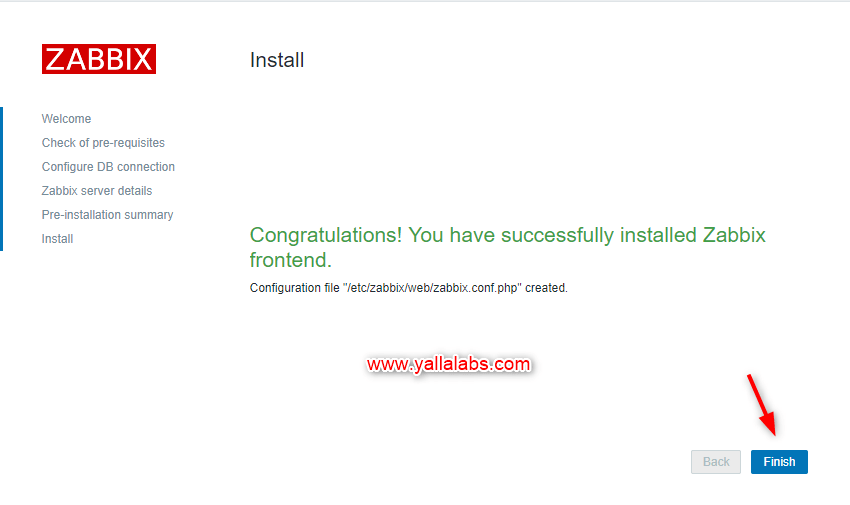
– Finish the installation.
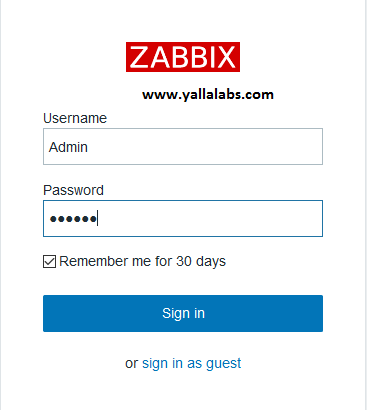
– Now you’ll be redirected to the zabbix web console page. The default user name is Admin and the password is zabbix .
We hope this tutorial was enough Helpful. If you need more information, or have any questions, just comment below and we will be glad to assist you!

4 comments
Very useful step-by-step! Thank you
Hi Ivan,
Thanks for the comment, please subscribe to our YouTube channel
Very useful step-by-step! Thank you.
A great resource and I have made a note of the URL!!
A complete list of steps which helped me greatly.
My web front end would fail and it was down to firewall settings you specified. Once done, it worked!!
Thank you for sharing!