Portainer is a web-based user interface for management of Docker environments. The Portainer is free and open-source management toolset that allows us to easily build, manage and maintain Docker environments.
Furthermore, Portainer Web UI gives us a detailed overview of our Docker environments and allows us to manage our containers, images, networks, volumes, registries, services, nodes and stacks from a single web interface.
In this tutorial, we will explain how to install a Portainer container on your Docker and how to use it to run your containers by deploying a WordPress stack.
Install Portainer container on Docker
01- Download the Portainer image from the DockerHub using the docker pull command below.
$ docker pull portainer/portainer
Using default tag: latest
latest: Pulling from portainer/portainer
d1e017099d17: Pull complete
fac26901c311: Pull complete
Digest: sha256:cc226d8a06b6d5e24b44a4f10d0d1fd701741e84a852adc6d40bef9424a000ec
Status: Downloaded newer image for portainer/portainer:latest
02- Next, run the Portainer container with the following command:
$ docker run -d -p 9000:9000 --name my_portainer --restart always -v /var/run/docker.sock:/var/run/docker.sock -v /opt/portainer:/data portainer/portainer
03- After installing the Portainer container, run the docker ps command to verify the status of the container:
$ docker ps
CONTAINER ID  IMAGE                CREATED        STATUS        PORTS                  NAMES
e5490fc45ce3  portainer/portainer  8 seconds ago  Up 6 seconds  0.0.0.0:9000->9000/tcp my_portainer
Access Portainer Web Interface
01- Now, open your browser, access the Portainer web interface with your server’s IP or FQDN with port 9000 http://DOCKER_SERVER_IP:9000/
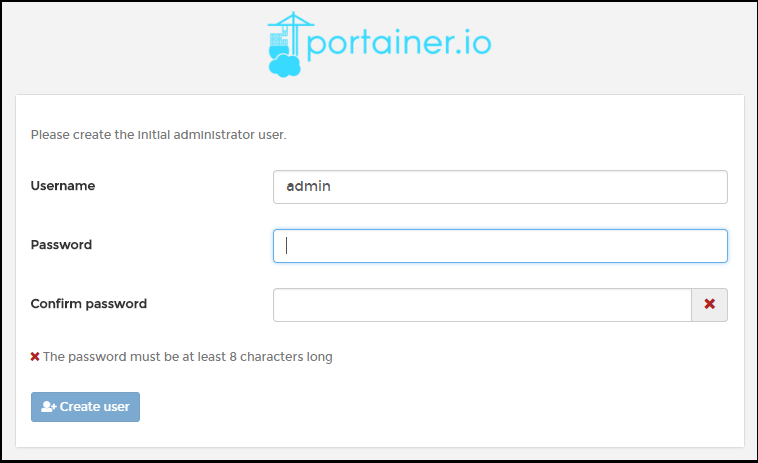
02- Next, provide your admin username and password. Then, click on the Create user button to create your initial administrator user.
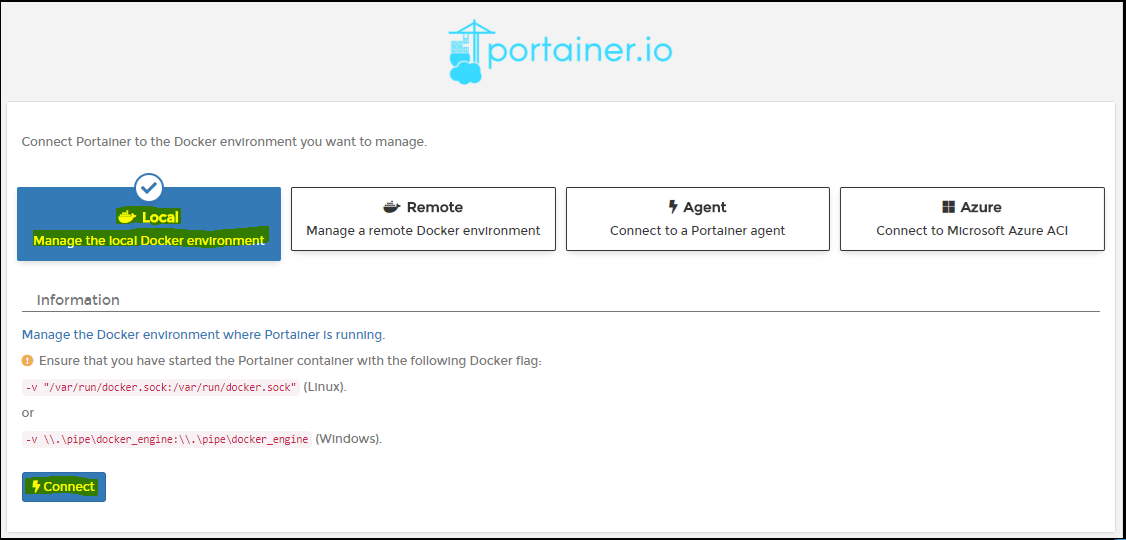
03- For this guide, we will configure Portainer to connect to the local Docker environment. So, select Local Docker environment and click on the Connect button
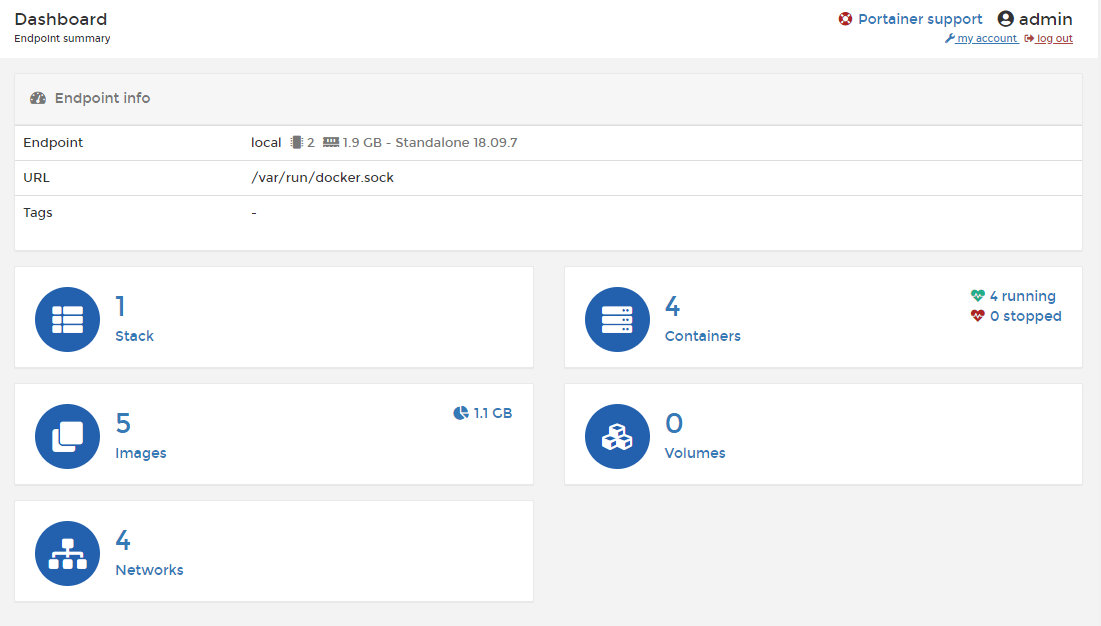
04- Finaly, you will be redirected to the Portainer dashboard, select the local endpoint to display an info about your endpoint and a summary about your containers, images, volumes and networks:
Create and Manage Containers Using Portainer Web UI
Now that we have installed and set up Portainer, let’s show you how to create containers. In this example we will deploy WordPress Stack to add WordPress and MySql at the same time, which is the easy way to deploy a WordPress.
01- Click the App Templates menu and from the the App Templates List select the WordPress Template
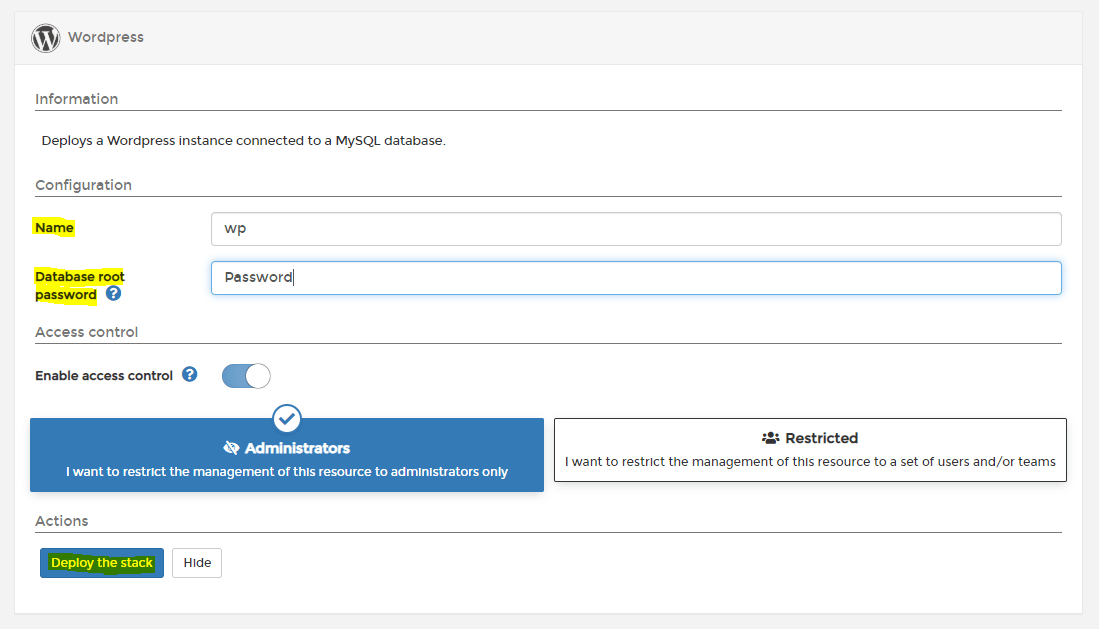
02- Deploy the WordPress Instance
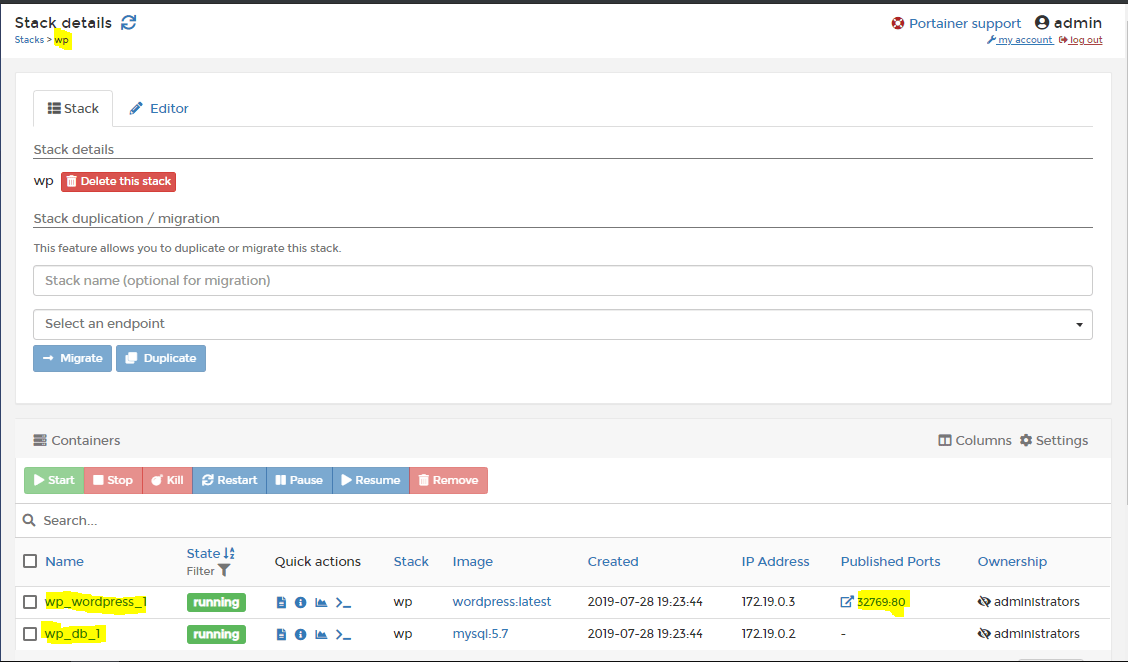
03- Check the status of the wordpress stack
Conclusion
This tutorial covered only the steps of installing Portainer Web UI and a basic concepts to run your containers. To learn more about how to use Portainer, visit the offcial Portainer website.




3 comments
Hi,
great article, could you please create articles on complete docker for production?
This hands-on explores how to deploy a custom nginx template.
docker run -d -p 9000:9000 -v /var/run/docker.sock:/var/run/docker.sock -v /tmp/portainer_password:/tmp/portainer_password portainer/portainer –admin-password-file /tmp/portainer_password
To view Portainer, click:
https://2886795279-9000-host10-fresco.environments.katacoda.com/
Username is admin, and password is admin@123. Connect to the local endpoint.
Mount the local directory to the nginx templates to be created.
Create the index.html file, with content hello fresco, and store it at /tmp/nginx.
Ensure that the file name and content are as specified.
Go to the Portainer dashboard, and create an nginx template by using the following details:
title :my-nginx
name : my-server
Platform:Linux
image : nginx:latest
port mapping : ‘8080:80’
Volume mapping : ‘/tmp/nginx:/usr/share/nginx/html’
Once template creation is successful, open dashboard->app templates->my-nginx->deploy this container to deploy it.
Open https://2886795279-8080-host10-fresco.environments.katacoda.com/ to access the html file created earlier.
Not able to complete this scenario in the katacoda can u please provide the last step to make it work
have you cleared this hands on ? am also struck at this hands on