
Choosing a high-availability solution for MySQL to prevent downtime and data losing, is really one of the important subjects for an IT System Admin to handle. Today, we are going to present you Percona XtraDB Cluster one of the MYSQL high-availability solutions on the market.
In the second part of the tutorial “Installing and Configuring Percona XtraDB Cluster High Availability“, we are going to show you how to install and configure HAProxy as a Load Balancer for the Percona XtraDB Cluster nodes on CentOS 7 / RHEL 7.
READ Part 1 – How to install and configure Percona XtraDB Cluster on Centos 7 / RHEL 7
Environment
This Lab will be assembled of three CentOS 7 servers/nodes and a HAProxy Load Balancer.
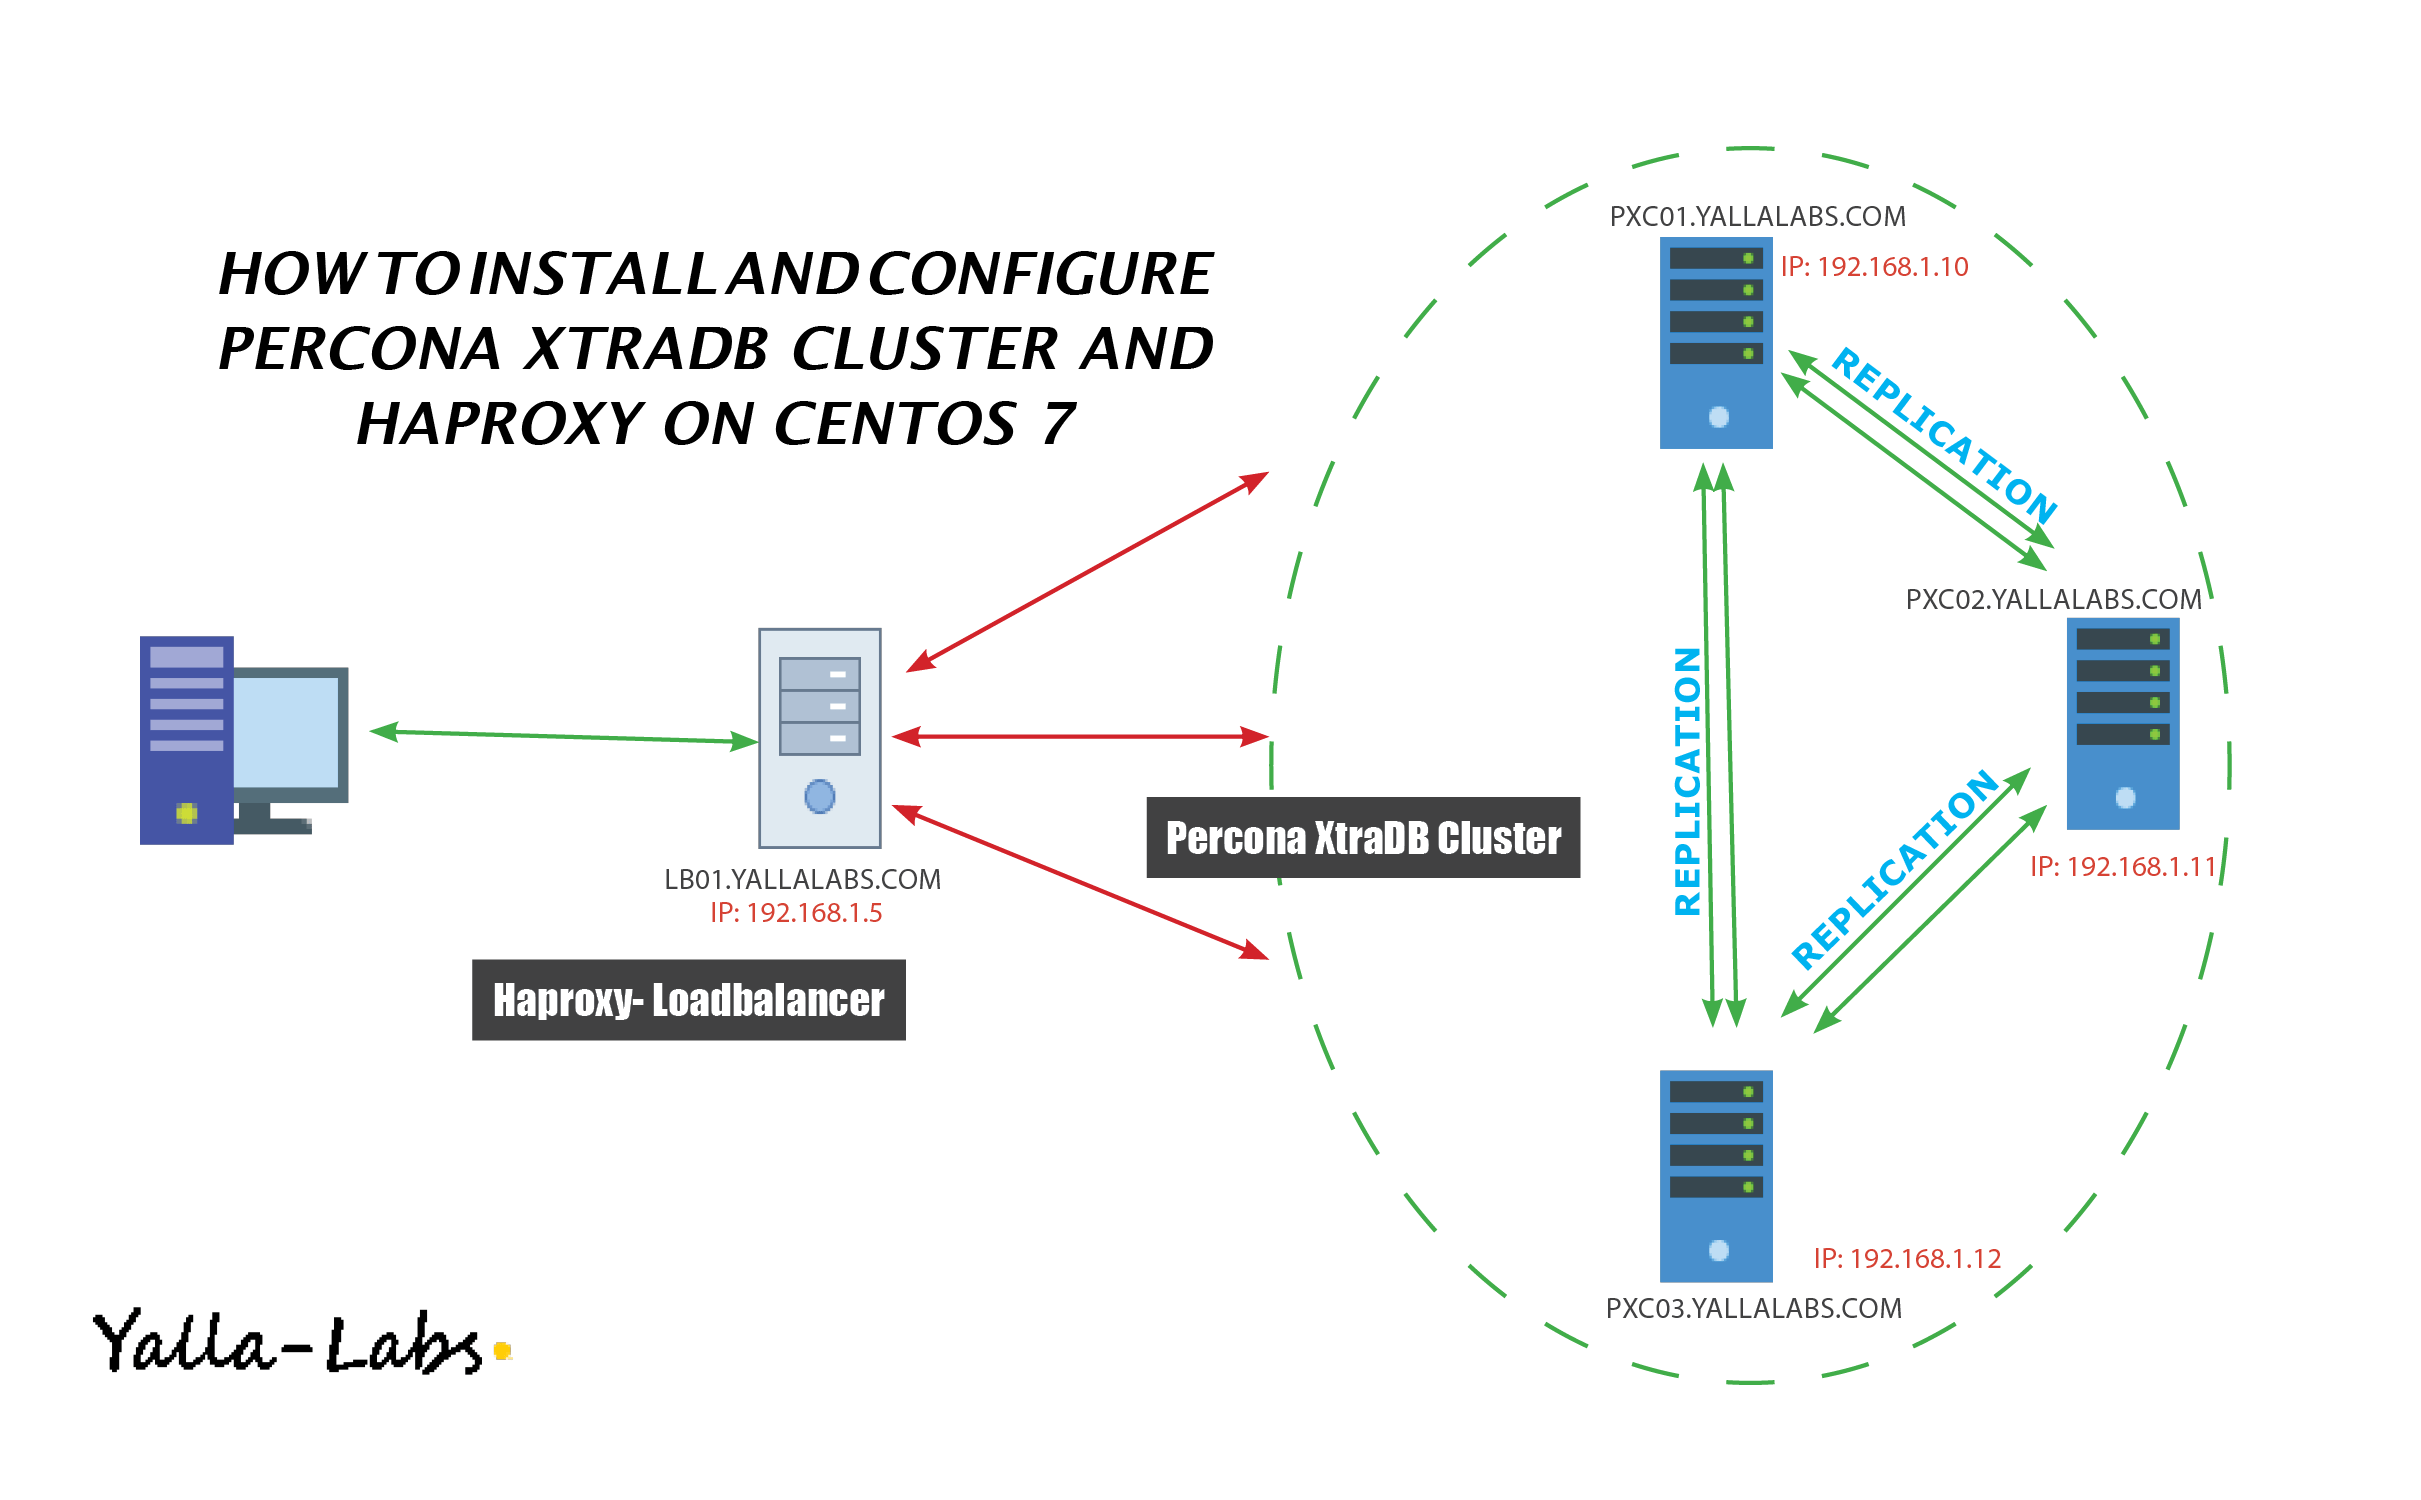
- Node 1
- Host name: pxc01.yallalabs.com
- IP address: 192.168.1.10
- Node 2
- Host name: pxc02.yallalabs.com
- IP address: 192.168.1.11
- Node 3
- Host name: pxc03.yallalabs.com
- IP address: 192.168.1.12
- HAProxy 1
- Host name: lb01.yallalabs.com
- IP address: 192.168.1.15
Step 1: Clustercheck Script Configuration
-1 Install xinetd service (3 nodes):
[root@pxc01 ~]# yum install xinetd -y
2- Add the new service to /etc/services (3 nodes):
[root@pxc01 ~]# vi /etc/services
mysqlchk     9200/tcp      # mysqlchk
3- Enable and start xinetd (3 nodes):
[root@pxc01 ~]# systemctl enable xinetd
[root@pxc01 ~]# systemctl start xinetd
4- set up the clustercheck user:
– On one of the Percona XtraDB Cluster create clustercheck user using the following commands
[root@pxc01 ~]# mysql -u root -p
mysql> grant process on *.* to 'clustercheckuser'@'localhost' identified by 'clustercheckpassword!';
Query OK, 0 rows affected (0.00 sec)

mysql> flush privileges;
Query OK, 0 rows affected (0.00 sec)
5- Check the node’s health by running the :
– Run clustercheck script using the following command to Check the node’s health
[root@pxc01 ~]# clustercheck clustercheck clustercheckpassword! 0
– If the node is running correctly you should get the following status
HTTP/1.1 200 OK
Content-Type: text/plain
Connection: close
Content-Length: 40

Percona XtraDB Cluster Node is synced.
6- Firewall Adjusting (3 nodes):
[root@pxc01 ~]# firewall-cmd --zone=public --add-port=9200/tcp --permanent
[root@pxc01 ~]# firewall-cmd --reload
Step 3: HAProxy Installation and Configuration
1- Install HAProxy
[root@lb01 ~]# yum install haproxy -y
2- HAProxy File Configuration:
[root@lb01 ~] # mv /etc/haproxy/haproxy.cfg /etc/haproxy/haproxy.cfg.org
[root@lb01 ~] # vi /etc/haproxy/haproxy.cfg
– Your file configuration should be like this.
#
global
        log 127.0.0.1   local0
        log 127.0.0.1   local1 notice
        maxconn 4096
        uid 99
        gid 99
        #daemon
        debug
        #quiet

defaults
        log     global
        mode    http
        option  tcplog
        option  dontlognull
        retries 3
        redispatch
        maxconn 2000
        contimeout      5000
        clitimeout      50000
        srvtimeout      50000

listen mysql-cluster 0.0.0.0:3306
    mode tcp
    balance roundrobin
    option  httpchk

    server pxc01 192.168.1.10:3306 check port 9200 inter 12000 rise 3 fall 3
    server pxc02 192.168.1.11:3306 check port 9200 inter 12000 rise 3 fall 3
    server pxc03 192.168.1.12:3306 check port 9200 inter 12000 rise 3 fall 3

listen stats 0.0.0.0:9000
## HAProxy stats web gui running on port 9000 - username  lotfi and password: secret
        mode http
        stats enable
        stats uri /stats
        stats realm HAProxy\ Statistics
        stats auth lotfi:secret
        stats admin if TRUE
3- Firewall Adjusting
[root@lb01 ~]# firewall-cmd --permanent --add-port=9000/tcp
[root@lb01 ~]# firewall-cmd --permanent --add-port=3030/tcp
[root@lb01 ~]# firewall-cmd --reload
4- Start/Enable HAProxy
[root@lb01 ~]# systemctl enable haproxy
[root@lb01 ~]# systemctl start haproxy
Step 3: Checking and Testing
– Open the browser with the ip address of the haproxy node on port 9000:

All nodes are online, let’s now try to query the cluster from a client machine using the ip address of the HAProxy
[root@server ~]# mysql -u root -p -h 192.168.1.15 -P 3306 -e "SELECT * FROM clustertest.employees"
+--------+------------------+
| number | name             |
+--------+------------------+
|      1 | Waderni Lotfi    |
+--------+------------------+
[root@server ~]#
That’s it for now, In the third Part of this tutorial we will try to add a secondary HAProxy node and configuring Keepalived for more High Availability.
We hope this tutorial was enough Helpful. If you need more information, or have any questions, just comment below and we will be glad to assist you!
PS. If you like this post please share it with your friends on the social networks using the buttons below.Thanks.