This tutorial demonstrates how to set or change the timezone on Ubuntu 18.04 LTS from the command line, or through the GUI. Those instructions can be applied on any Ubuntu based distribution or Debian.
Prerequisites
You’ll need to be logged in as a user with sudo privileges in order to change the system’s timezone.
Checking the Current Timezone
– In Ubuntu and most other Linux distributions we can use the timedatectl command to display and set the current system’s time and timezone.
$ timedatectl
                      Local time: Thu 2019-01-24 20:58:13 UTC
                  Universal time: Thu 2019-01-24 20:58:13 UTC
                        RTC time: Thu 2019-01-24 20:58:13
                       Time zone: Etc/UTC (UTC, +0000)
       System clock synchronized: yes
systemd-timesyncd.service active: yes
                 RTC in local TZ: no
– Alternatively, you can also check the current system’s timezone by displaying the contents of the /etc/timezone file.
$ cat /etc/timezone
Etc/UTC
Changing the Timezone Using the timedatectl Command
01- To list all available time zones, you can either list the files in the /usr/share/zoneinfo directory or use the timedatectl command like below:
$ timedatectl list-timezones | grep -i europe
...
Europe/London
Europe/Luxembourg
Europe/Madrid
....
Europe/Moscow
Europe/Oslo
Europe/Paris
Europe/Podgorica
Europe/Prague
Europe/Riga
Europe/Rome
02- Once you identify which time zone is accurate to your location, run the following command as sudo user by indicating the your time zone:
$ sudo timedatectl set-timezone your_time_zone
– In this example, we will change the system’s timezone to Europe/Rome like below:
$ sudo timedatectl set-timezone Europe/Rome
03- Run the timedatectl command to verify the changes:
$ timedatectl
                      Local time: Thu 2019-01-24 22:18:20 CET
                  Universal time: Thu 2019-01-24 21:18:20 UTC
                        RTC time: Thu 2019-01-24 21:18:20
                       Time zone: Europe/Rome (CET, +0100)
       System clock synchronized: yes
systemd-timesyncd.service active: yes
                 RTC in local TZ: no
Changing the Timezone by Reconfiguring tzdata
01- Identify the timezone you want to configure by using the following command :
$ timedatectl list-timezones
02- Save the new timezone name to /etc/timezone file using the tee command:
$ echo "Europe/Rome" | sudo tee /etc/timezone
Europe/Rome
03- Run the following command to change the system’s timezone:
$ sudo dpkg-reconfigure --frontend noninteractive tzdata

Current default time zone: 'Europe/Rome'
Local time is now:      Thu Jan 24 22:21:59 CET 2019.
Universal Time is now:  Thu Jan 24 21:21:59 UTC 2019.
Changing the Timezone Using the GUI
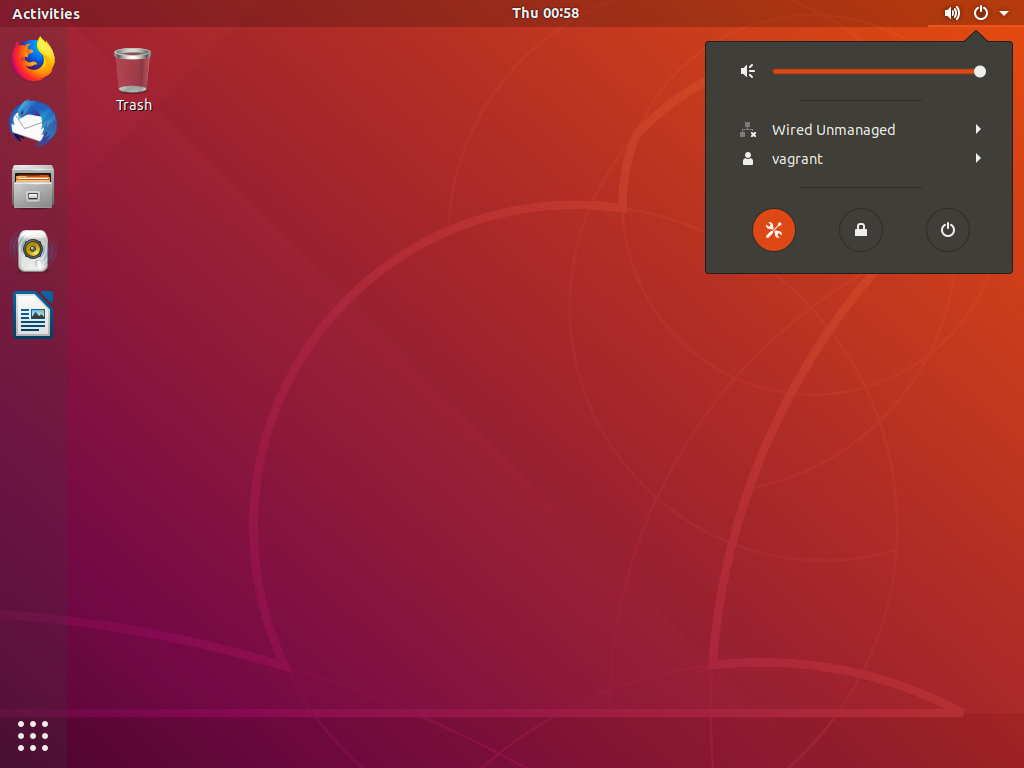
01- Open the system settings window by clicking on the Settings icon as shown in the image below:

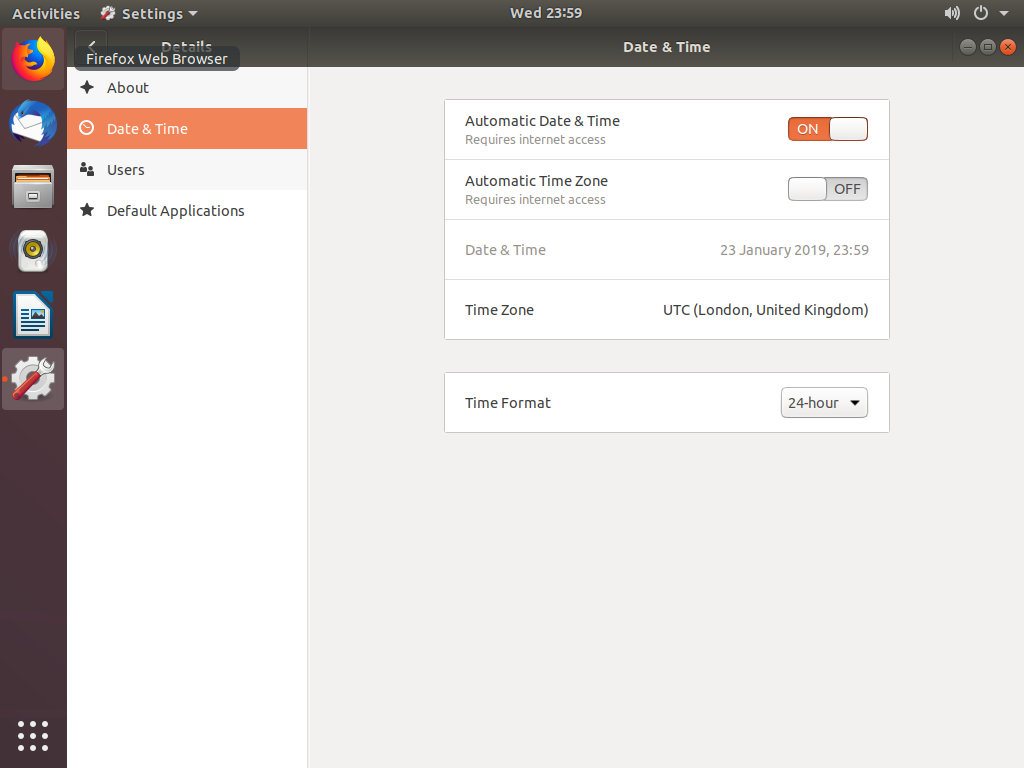
02- In the system settings window click on the Date & Time tab, turn the Automatic Time Zone to OFF and click on the Time Zone option
Notice, if the Automatic Time Zone set to ON and you have an Internet connection. the time zone should be automatically set according to your location.
03- To select the new timezone you can either search for a time zone through the search bar or click on the map.
Conclusion
Your successfully set up or change the timezone on Ubuntu 18.04 from the command line, or through the GUI. You might want to check the following guides:
- How to configure static IP address on Ubuntu 18.04 LTS Bionic Beaver
- How to install MariaDB 10 Server on Ubuntu 18.04 LTS Bionic Beaver
- How To Install PostgreSQL 11 on Ubuntu 18.04 LTS Bionic Beaver
- How To Install Apache Tomcat 9 Server on Ubuntu 18.04 LTS Bionic Beaver
- How to Install Zabbix Server 4 on Ubuntu 18.04 LTS Bionic Beaver
We hope this tutorial was enough Helpful. If you need more information, or have any questions, just comment below and we will be glad to assist you!


