TeamViewer is a cross-platform, proprietary application that allows a user to remotely connect to a workstation, transfer files, and have online meetings. In this tutorial, we will walk you through how to install TeamViewer on Ubuntu 20.04 Desktop through the command line.
Prerequisites
Before continuing with this tutorial, make sure you are logged in as a user with sudo privileges.
Installing TeamViewer on Ubuntu
01- To install TeamViewer, first, download the TeamViewer .deb package. So, open the Terminal and run the following wget command.
$ wget https://download.teamviewer.com/download/linux/teamviewer_amd64.deb
02- Once you have downloaded the TeamViewer‘s Debian package, execute the following command to install Teamviewer:
$ sudo apt install ./teamviewer_amd64.deb
The system will prompt you with a [Y/n] option. Type ‘Y‘ and hit the enter key in order for to continue the installation.
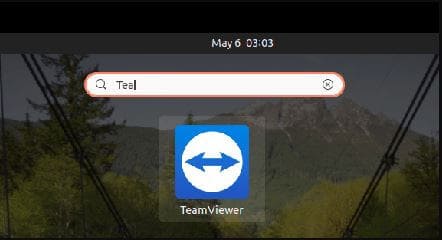
03- Once the installation is done, you can launch TeamViewer either by typing the command teamviewer in your terminal or by clicking on the TeamViewer icon (Activities -> TeamViewer).
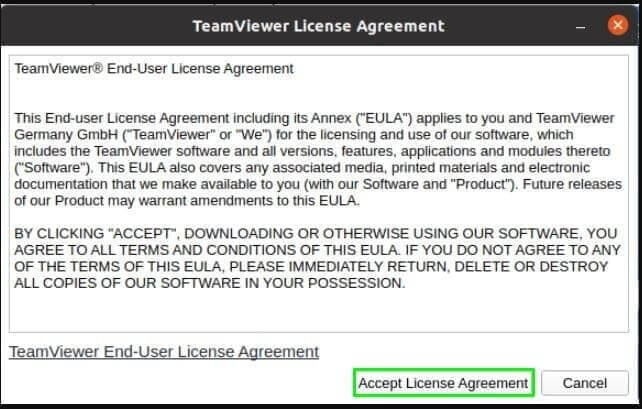
04- A pop-up License Agreement will be displayed. To proceed, click on the Accept License Agreement button.
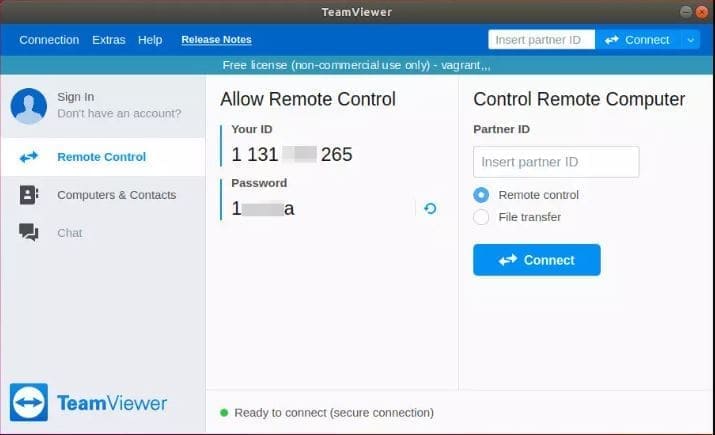
05- TeamViewer will open and you’ll see something like the following.
Conclusion
You have successfully installed TeamViewer on your Ubuntu 20.04 LTS. You might want to check the following guides:
- How to Install Zoom on Ubuntu 20.04
- Learn How to Install Microsoft Teams on Ubuntu 20.04
- How to Install Google Chrome Web Browser on Ubuntu 20.04
