Introduction
In this tutorial, we will cover the installation of Nagios 4 core , a very popular open source monitoring system, on Ubuntu 16 LTS. We will cover some basic configuration to be able to monitor host resources via the web interface.
Nagios is an essential monitoring tool for any production infrastructure environment, by keeping an inventory of your servers, and making sure your critical services are up and running.
Prerequisites
To follow this tutorial, you must have some prerequisites:
– A superuser Privileges to install Nagios 4 core, Nagios Plugins and NRPE Plugins.
– A LAMP stack is also required to access to the nagios web GUI. Follow this tutorial if you need to set that up: How To Install Linux, Apache, MySQL, PHP (LAMP) stack on Ubuntu 16 LTS .
Now that we have the prerequisites sorted out, let’s move on to getting Nagios 4 installed.
Install Nagios 4
This section will cover how to install Nagios 4 core on your monitoring server.
1/ Create Nagios User and Group
# sudo useradd nagios
# sudo groupadd nagcmd
# sudo usermod -a -G nagcmd nagios
2/ Install
Because we are building Nagios Core from source, we need to install a few development libraries that will allow us to complete the installation of the package.
# sudo apt install build-essential libgd2-xpm-dev openssl libssl-dev xinetd apache2-utils
3/ Install Nagios Core
The latest stable release is Nagios 4.1.1. Download it to your tmp directory with curl or with wget:
 # cd /tmp
# wget https://assets.nagios.com/downloads/nagioscore/releases/nagios-4.1.1.tar.gz
# tar xzf nagios-4.1.1.tar.gz # unpack the Nagios archive
# cd /nagios-4.1.1.tar.gz ##change to the extracted directory
#
Let’s start the installation procedure:
 # ./configure --with-nagios-group=nagios --with-command-group=nagcmd
# sudo make install
# sudo make install-commandmode
# sudo make install-init
# sudo make install-config
Now we need to finish the installation by build the Nagios core web GUI.
# sudo /usr/bin/install -c -m 644 sample-config/httpd.conf /etc/apache2/sites-available/nagios.conf
# sudo usermod -G nagcmd www-data #add the default apache user to nagcmd group
After finish the installation we need to create a user to access to Nagios core web GUI by
# sudo htpasswd -c /usr/local/nagios/etc/htpasswd.users nagiosadmin
Note : if you want to create another user name not “nagiosadmin” to access to the nagios core web GUI you will need to edit /usr/local/nagios/etc/cgi.cfg and change all the “nagiosadmin” references to the user you created in the installation of the core web GUI.
Finally let’s do some Apache configuration to finish the installation:
 # sudo a2enmod rewrite # Enable the rewrite module
# sudo a2enmod cgi # Enable the cgi module
# sudo a2ensite nagios.conf # Enable the new Nagios core web Files or u can use ln -s /etc/apache2/sites-available/nagios.conf /etc/apache2/sites-enabled/
#sudo service apache2 restart # Restart Apache
3/ Install Nagios Plugins
Now that we have finish the installation of Nagios Core, let’s move on to install the Nagios Plugins that will be utilized for the checking.
If uou want to install the last stable release of Nagios Plugins u can check the Nagios Plugins download site
 # cd /tmp
# wget http://www.nagios-plugins.org/download/nagios-plugins-2.1.1.tar.gz
# tar xzf nagios-plugins-2.1.1
# cd nagios-plugins-2.1.1
# ./configure --with-nagios-user=nagios --with-nagios-group=nagios --with-openssl
# make all
# make install
4/ Install NRPE Plugin
To download the last stable NRPE package vist download NRPE sourceforge project site
# cd /tmp
# wget http://downloads.sourceforge.net/project/nagios/nrpe-2.x/nrpe-2.15/nrpe-2.15.tar.gz
# tar xzf nrpe-2.15.tar.gz
# cd nrpe-2.15/
# ./configure --enable-command-args --with-nagios-user=nagios --with-nagios-group=nagios --with-ssl=/usr/bin/openssl --with-ssl-lib=/usr/lib/nx86_64-liux-gnu
# make all
# sudo make install
# sudo make install-xinetd # configure NRPE to run under xinetd
# sudo make install-plugin
After that let’s test that the check_nrpe plugin is properly installed and can communicate with a remote computer running a NPRE client daemon.
# /usr/local/nagios/libexec/check_nrpe -H ip of your remote host
NRPE v2.15
If everything works good you should receive a response like this “NRPE v2.15”. And don’t forget to open the port 5666 in your firewall on the remote host computer .
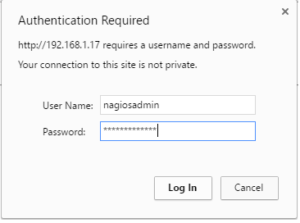
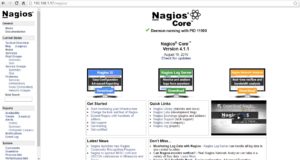
Now, let’s check if we can access to the Nagios web Interface: open your browser ant tape :
http://nagios_server_ip/nagios
That’s it for now, i hope that you like my post about how to install Nagios Core 4,Nagios Plugin and NRPE Plugin on Ubuntu 16.04 LTS (Xenial Xerus).
In the next tutorials, i’m gonna explain how to install NRPE daemon and Nagios Plugins on the remote host computer and how to monitor your servers.
We hope this tutorial was enough Helpful. If you need more information, or have any questions, just comment below and we will be glad to assist you!


