PgAdmin is the leading graphical Open Source management, development and administration tool for PostgreSQL. PgAdmin 4 is a rewrite of the popular pgAdmin3 management tool for the PostgreSQL database.
In this tutorial, we are going to show you how to install PgAdmin 4 in Server Mode as a web application using apache2 and Wsgi module on Ubuntu 16.04 LTS and Ubuntu 18.04 LTS.
If you didn’t yet install PostgreSQL take a look the below links :
- How to Install PostgreSQL 10 on Ubuntu 16.04 LTS
- How To Install PostgreSQL 10 on CentOS 7 / RHEL 7
- How to Install PostgreSQL on Ubuntu 16.04 LTS
- How To Install PostgreSQL 9.6 on CentOS 7 / RHEL 7
- How To Change PostgreSQL Data Directory Location on Ubuntu 16.04
- How To Enable Network Remote Access To PostgreSQL Database Server
- How to install pgAdmin 4 in desktop mode on Ubuntu 16.04 LTS
- How to install pgAdmin 4 in Server mode as web application on CentOS 7 / RHEL 7
- How to install pgAdmin 4 in Server mode on Ubuntu 16.04 LTS
Step 1. Install Dependencies/ Requirements Packages
# sudo apt install build-essential libssl-dev libffi-dev libgmp3-dev virtualenv python-pip libpq-dev python-dev
– We need also to install Apache2 package and the WSGI module to run PgAdmin4 as a web Application
# sudo apt install apache2 apache2-utils libapache2-mod-wsgi libexpat1 ssl-cert python
Step 2. Create the virtual environment
– Create the virtual enviroment:
# cd /opt
# virtualenv pgadmin4
– Activate the virtual enviroment:
# cd pgadmin4
# source bin/activate
Step 3. Download and install PGAdmin 4
– The only way to install PgAdmin 4 is to download the PgAdmin Python wheel, you can get the latest PgAdmin4 python wheel file from pgAdmin4 official download page, use the following command to download PgAdmin Python wheel:
# wget https://ftp.postgresql.org/pub/pgadmin/pgadmin4/v3.2/pip/pgadmin4-3.2-py2.py3-none-any.whl
– Install PgAdmin 4 using the following command:
# pip install pgadmin4-3.2-py2.py3-none-any.whl
– In order to configure PgAdmin4 to run in server mode properly as a web application, it may be necessary to specify the path of the PgAdmin4 database, Sessions and Log file. Open config_distro.py file and add the following settings:
(pgadmin4) root@ylcpg4as01:/opt/pgadmin4# vi lib/python2.7/site-packages/pgadmin4/config_distro.py
LOG_FILE = '/var/log/pgadmin4/pgadmin4.log'
SQLITE_PATH = '/var/lib/pgadmin4/pgadmin4.db'
SESSION_DB_PATH = '/var/lib/pgadmin4/sessions'
STORAGE_DIR = '/var/lib/pgadmin4/storage'
– Run the following command to create the configuration database.
(pgadmin4) root@ylcpg4as01:/opt/pgadmin4# python lib/python2.7/site-packages/pgadmin4/setup.py
NOTE: Configuring authentication for SERVER mode.

Enter the email address and password to use for the initial pgAdmin user account:

Email address: [email protected]
Password:
Retype password:
/opt/pgadmin4/local/lib/python2.7/site-packages/psycopg2/__init__.py:144: UserWarning: The psycopg2 wheel package will be renamed from release 2.8; in order to keep installing from binary please use "pip install psycopg2-binary" instead. For details see: <http://initd.org/psycopg/docs/install.html#binary-install-from-pypi>.
  """)
pgAdmin 4 - Application Initialisation
======================================
– If you got a warning regarding the psycopg2 wheel package, you need to install the new release using the following command:
(pgadmin4) root@ylcpg4as01: pip install psycopg2-binary
– Let’s now deactivate the virtual enviroment as below
(pgadmin4) root@ylcpg4as01: deactivate
– Change the ownership of the configuration database directory and the log files to the user www-data:
# chown -R www-data:www-data /var/lib/pgadmin4/
# chown -R www-data:www-data /var/log/pgadmin4/
Step 4. Create the Apache Virtual Host for PGAdmin 4
– Create a new apache virtual host file and add the following lines, make sure to replace pgadmin.yallalabs.local with your domain/subdomain name:
# vi /etc/apache2/sites-available/pgadmin4.conf
<VirtualHost *:80>
    ServerName pgadmin.yallalabs.local
    LogLevel debug
    ErrorLog ${APACHE_LOG_DIR}/pgadmin-error.log
    CustomLog ${APACHE_LOG_DIR}/pgadmin-access.log combined

    LoadModule wsgi_module modules/mod_wsgi.so
    WSGIDaemonProcess pgadmin processes=1 threads=25 python-home=/opt/pgadmin4
    WSGIScriptAlias / /opt/pgadmin4/lib/python2.7/site-packages/pgadmin4/pgAdmin4.wsgi

    <Directory "/opt/pgadmin4/lib/python2.7/site-packages/pgadmin4/">
        WSGIProcessGroup pgadmin
        WSGIApplicationGroup %{GLOBAL}
        Require all granted
    </Directory>
</VirtualHost>
– You can use the apache2ctl tool to do a sanity check:
# apache2ctl configtest
– Now that we have created our PgAdmin virtual host file, we must enable it. We can use the a2ensite tool like this, obviously we need to restart Apache after any changes:
# a2ensite pgadmin4.conf
# service apache2 reload
Step 5. Access PGAdmin 4
– If the Firewall is enabled, execute the following command to enable http port :
# sudo ufw allow http
# sudo ufw reload
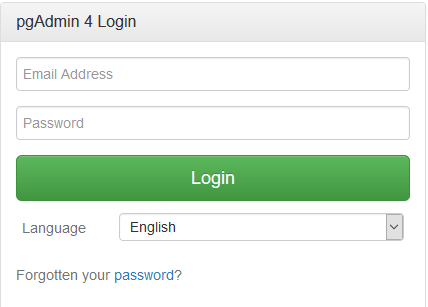
– Open http://your_domain_or_subdomain and logon to the PgAdmin 4 using the credentials that has been done on the third step.
We hope this tutorial was enough Helpful. If you need more information, or have any questions, just comment below and we will be glad to assist you!
PS. If you like this post please share it with your friends on the social networks using the buttons below.Thanks.


