
Monit is an opensource monitoring tool for Linux operating system which helps you to monitor:
– Monitor the server programs to ensure that they stay online.
– Monitor the system load like CPU, RAM, Swap…
– Monitor Disks, Partitions or Files size, Checksum, or Permissions changes
– Monitor Hardware health (harddisk, Motherboard …)
– …
Additionally Monit comes with a basic web interface through which you canc check the status of your system. Monit is very usefull because it can send an email alert anytime a service fails and you can configurate to attempt to fix any failed services.
This tutorial will cover the most basic setup and configuration of Monit on CentOS 7 / RHEL 7.
1./ Install Monit
– Configure EPEL repo to download the latest Monit package.
# sudo rpm -ivh https://dl.fedoraproject.org/pub/epel/epel-release-latest-7.noarch.rpm
– Install Monit using the following command:
# yum -y install monit
– Start and Enable Monit at system boot by using the following command:
# systemctl enable monit
# sytemctl start monit
– You can Check the Monit status by using the following command:
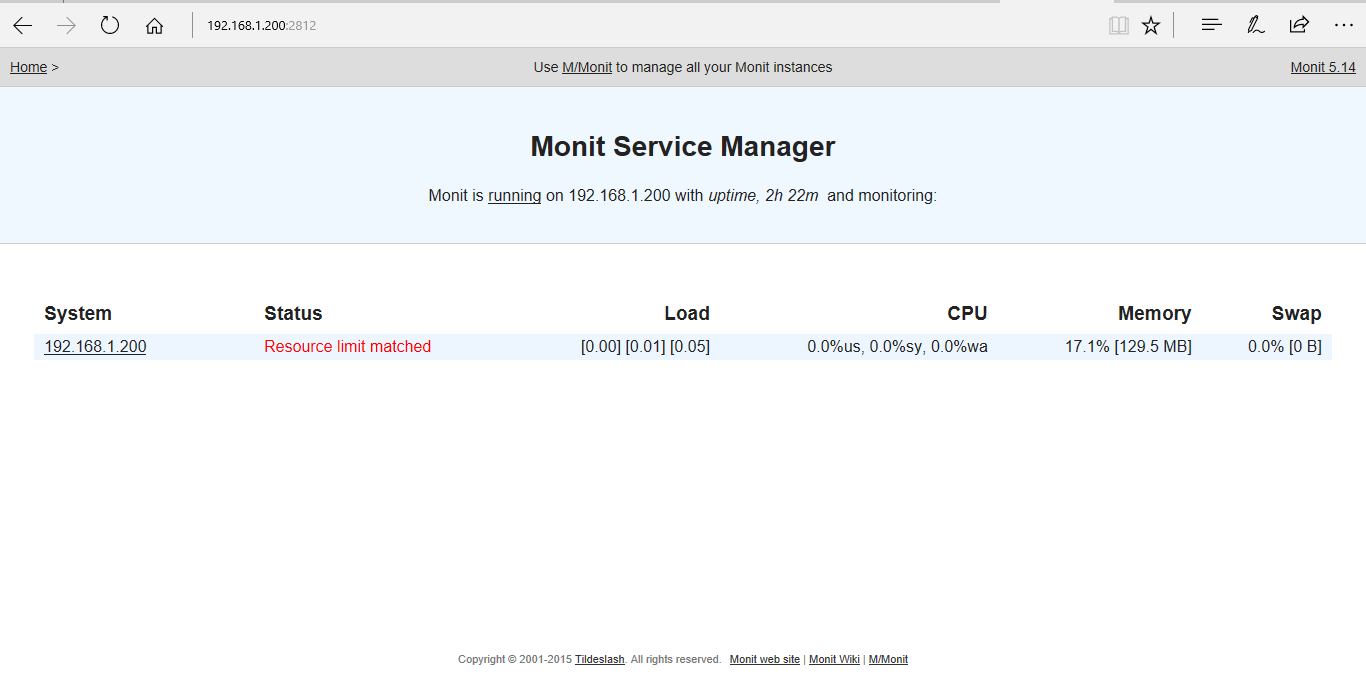
# monit status
The Monit daemon 5.14 uptime: 8m

System '192.168.1.200'
  status                            Resource limit matched
  monitoring status                 Monitored
  load average                      [0.01] [0.07] [0.05]
  cpu                               0.0%us 0.0%sy 0.0%wa
  memory usage                      127.5 MB [16.8%]
  swap usage                        0 B [0.0%]
  data collected                    Sun, 09 Jul 2017 14:24:09
2./ Configure Monit
– By default, Monit configured to check services are running every 30 secondes, in this tuttorial we will set it up to 1 minutes.
## Start Monit in the background (run as a daemon):
#
set daemon  60              # check services at 30 seconds intervals
– To configure the web interface, find and uncomment the following lines:
set httpd port 2812
    use address server_ip  # only accept connection from localhost
    allow 0.0.0.0/0.0.0.0        # allow localhost to connect to the server and
    allow admin:monit      # require user 'admin' with password 'monit'
– To configure Monit to send alert emails, find and uncomment lines:In this example we configured Monit to work with with Gmail as mail server
## Monit by default uses the following format for alerts if the the mail-format
## statement is missing::
## --8<--
set mail-format {
      from: from: monit@$HOST
   subject: monit alert --  $EVENT $SERVICE
   message: $EVENT Service $SERVICE
                 Date:        $DATE
                 Action:      $ACTION
                 Host:        $HOST
                 Description: $DESCRIPTION

            Your faithful employee,
            Monit
 }
#using TLSV1 with timeout 30 seconds
set mailserver smtp.gmail.com port 587
username "[email protected]" password "Your_Password"
using TLSV1 with timeout 30 seconds

# the person who will receive notification emails
set alert [email protected]
– Once you finish the configuration, test the monit syntax using the following command;
# monit -t

Control file syntax OK
– To take effect of changes, type the following command to reload the monit daemon:
# monit reload
– To access the Monit web interface, open the browser, go to the ip of the server http://ip.address:2812 and enter your credentials that you configured before .
We hope this tutorial was enough Helpful. If you need more information, or have any questions, just comment below and we will be glad to assist you!
PS. If you like this post please share it with your friends on the social networks using the buttons below.Thanks.
2 comments
I am getting error
No package monit available.
Is there any other way to install this?
Hi,
Make sure to install EPEL repository like below:
yum install epel-release
yum update